
After writing recently about how to make golf less expensive, I thought it made sense to dig into the area of DIY golf a little bit more. This is certainly a way to take the edge off the cost of golf equipment but it is also a great hobby in its own right and something that I probably enjoy just as much as getting to the course itself. If you are interested in working on your own equipment, here are two things that you can do simply and easily at home.
Changing Golf Grips
Probably the simplest way to get into tinkering with your own clubs is by changing grips. This doesn’t need any specialist equipment and doesn’t take a lot of time. I haven’t paid anyone to change my own grips for years. The issue with getting your grips changed at a golf store is both time and cost. You might wait for a few days to get it done when you can do it yourself in a few minutes. Your local golf shop will also probably only offer some of the better known manufacturers like Golf Pride or Lamkin. These are generally very good grips in my opinion, but they aren’t the only option and certainly not the most cost effective. For example, getting a standard grip from one of these companies might cost 7 or 8 dollars/euros/pounds. The cost from a golf shop might be a little more than that. Then there will be a little bit more for the cost of fitting and you have perhaps almost doubled the original cost.
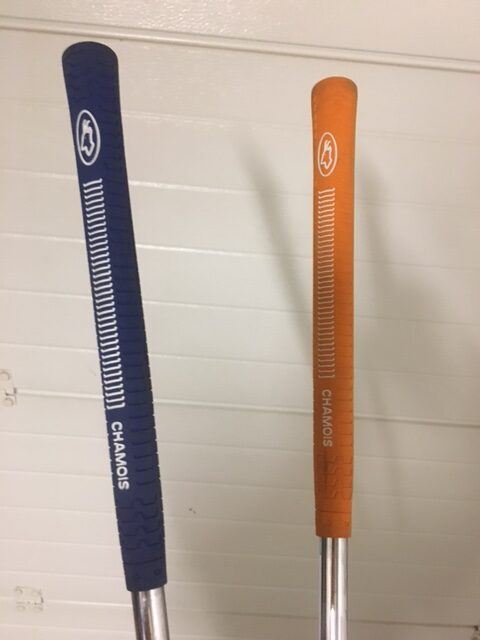
As a contrast, let’s look at what I have on one of my sets of irons. I like colourful grips as you can see! These are Karma jumbo grips. They cost me well under half the price of some of the better-known grips you might find on your clubs straight from the manufacturer. Each grip took me a couple of minutes to install and the whole set 4 to pitching wedge came to around 30 euros I would guess, perhaps less. These grips are, in my opinion, easily as good as the aforementioned brands and it lets me personalise my set as well as trying out a jumbo grip to see how that affects my swing.
Related Posts:


Fitting these grips was easy. Rather than giving a detailed account, here is a simple list of instructions to show you just how easy. I will then talk you through it in a bit more detail.
- Cut off the old golf grips (using a hooked knife is safer and easier. Always cut away from you)
- Scrape off the old grip tape. Use a blunt knife, then an abrasive sponge and/or cloth with white spirit)
- Apply new grip tape
- Pour grip solvent/white spirit over the tape and into the new grip
- Slide the new grip onto the club, be careful to line it up straight
- Done!
If you are reading this and thinking that one of these steps isn’t clear, honestly the best way to get it is simply to try with a cheap grip. You can find some perfectly serviceable grips from a couple of dollars so even it you make a mess of it, it isn’t an expensive lesson.
The first two steps are really straightforward. There is no wrong way to do this as long as you are careful with the knife. If you aren’t confident, simply make a small cut in the bottom of the grip and then gradually pull, peeling it off the shaft a bit like a banana skin. Generally, the grip tape is easy enough to remove. It can be a bit more difficult if you are refurbishing classic clubs which haven’t been regripped for years/decades, but it isn’t a bit deal.
Putting on Grip Tape
Grip tape is very easy to apply. It can even be bought in individual strips that simply fit along the length of the shaft. If you buy it in a roll, just make sure to measure a length that is slightly shorter than the grip so that it doesn’t stick out. You can apply as many layers as necessary, whether it is one or ten like Bubba Watson! Adding more layers of tape will make the grip thicker and can make the grip a lightly tighter fit when sliding it on.
When you pour the white spirit or grip fluid onto the grip, be sure to cover it quite well. This basically stops the tape sticking when you slide the grip on and then it will dry and hold the grip firmly in place. Most DIY golfers will put a basin underneath the club to catch the excess so that you can regrip a whole set with as little wastage as possible.
Putting on the grip itself does take a little bit of practice. It is generally easier to do if you have the club held in a vice, but in all honesty, I tend to just stand the club up in the address position. I find that it is easier to line the grip up with the club. Simply work the opening of the new grip over then end of the club and then slide it down firmly without twisting. The grip won’t fix in place immediately so you can then twist it slightly to make sure that it is on straight.
If you are a bit more experienced, you can even get a grip off the club and use it again, but generally this is a bit of a pain in the neck and nine times out of ten, the best bet is simply to cut the grip off. If you are using an air compressor and something like the rubber grips from Pure, you can just first grips off and on without damaging then too.
Adding a Shaft Extension
Another straight forward job is to add shaft extensions to your clubs. This is something that I do regularly given that I tend to play most of my irons over length and like buying second hand clubs. It is far easier for me to find an iron set that I like and then extend them rather than trying to find the set in the exact specs I want.
A word of warning here. If you add length to a golf club, you will change its swing weight. This is essentially how heavy the club feels when you swing it. Adding an inch to a shaft does’t really make it much heavier in overall weight but it can feel quite a lot heavier to swing. Generally, I don’t find this to be an issue to most average golfers, especially when adding less than an inch to the club. If you are more sensitive to swing weight or are thinking of adding more than an inch, there are ways to reduce the swing weight. This might include things like counter weighting, but this is going to be a little bit more technical. For most of us, adding an extension isn’t really going to change things as much as it is sometimes feared.
I am going to be talking here about adding an extension to steel shafts. Graphite can be a bit different and is generally, in my experience at least, a more delicate job.
There are two options for adding an extension. The first is to buy a ready-made extension. These usually come in a single piece of metal that can be used for two clubs. It will have a thinner section at both ends that slides inside the shaft and a thicker section that can be cut to length.
Simply measure out the extra length you need and mark it with a marker pen. Then use a metal saw (or a pipe cutter if you have one) to cut the extension. Be careful to cut straight and it is always better to have the extension held firmly in place as you do it. If you cut on an angle this can damage the top of the grip.
When the extension is cut to the right length, Use some sand paper to roughen the surface of the thinner section that fits inside the original shaft. Then do the same with the inside of the shaft itself. These will make the glue stick better. Apply epoxy to the inside of the shaft and to the extension. Make sure that there is plenty of glue that covers all the surface of the metal but don’t go mad. You don’t want big dollops of glue that will harden and fall into the shaft itself causing an annoying rattle when you swing the club.
When you have done this, simply slide the extension into the shaft and wipe off any excess epoxy. This should dry fairy quickly depending on the glue you use then you are ready to regrip and go.
Extending a Club with an Old Shaft
You can also use an old shaft to extend the club. This is essentially the same as using a shaft extension, however you need to be a little bit more careful when cutting. Depending on how much of the shaft you cut, you will find that it will slide further into the original shaft and you might find that your mark at one inch is now only half an inch or whatever. I like this method a lot because it involves reusing old material that would otherwise just end up being thrown away.
The great thing about extending shafts is that it can be removed easily too. All you need to do is to remove the grip as explained above. Then use a heat gun to gently heat the shaft where the extension is. This will break down the glue bond. Using a heat proof glove (oven glove), simply twist the shaft extension out.
Doing DIY on your golf equipment is, in my opinion, a lot of fun. I find it immensely satisfying to build, modify or personalise my own clubs and then take them out on the course. Changing grips and extending shafts are probably tow of the easiest jobs if you are looking to get into this sort of tinkering but there are of course plenty of other things you can do. Hopefully this is enough to get you started and in another article I will give a few more ideas for fun jobs that you might like to try.